Sunday, May 25, 2014

Adulthood Begins

for those graduating this month or next  whether it is from high school or college.  Don't you just love the bright promise and eager anticipation this time of year brings?  Best  wishes to all those beginning their independent lives --- AKA adulthood.  Oh the lessons they will learn :-)
 
Today's card was really easy to put together, but I like how it turned out.   Clean and simple.
 
 
  • DCWV cardstock from the "Butterfly Garden" stack
  • Grad Flourish cut file
  • Stickles in 'stardust'
  • 'Amaze' font
I chose the Amaze font from my computer and cut the words and year in, I believe (I didn't make a note of that, sorry!) 72 Pt size and then chose to pull it out to make it just a tiny bit bigger.   I also re-sized the Grad Flourish cut file.  All the elements were then glued to the card and I used 'Stardust' Stickles to highlight the swirl and the tassel, set the card aside to dry, and it's good to go.

Thank you for stopping by More Paper Kisses and Inky Wishes.  Enjoy what's left of the Memorial Day Weekend, and don't forget to hug a veteran!   Shawna

Sunday, May 11, 2014

Getting a Faux Stained Glass Look

Hi! Thanks for stopping by today. This Silhouette Sunday will be a tutorial for a "stained glass" technique using your SD or Cameo. First, just let me say this is my very first tutorial so please bear with me and please be kind! :-) Let's get started.

Choose a file with a lot of cut-out pieces. Frames work great and that is what I am using for this tutorial.

Once you have your file up on the the design board in Studio adjust it to your desired finished size. Next decide how many colors you want to use and choose your papers accordingly.
The next step is to cut the exact same file as many times as the colors you have chosen for your design. Six colors? Cut six designs, all the same size.
Choose the color you want to be the main frame and weed. Weed the other frames as well; these weeded pieces will be used for the different elements inside the edges of your frame. Keep them someplace safe where they will not get knocked around and lost. I find it is easiest to place the weeded pieces inside a shallow pan or in a box lid in a pattern loosely matching the design pattern.   The idea is to have them in enough order so that you can choose the right piece for the right cut out. Believe it nor not, even mirrored images can be a tiny bit off in size and if you get a piece meant for the right side in the left hole and vice versa it might not fit properly. Back and front orientation is important, too. You can save the extra frames for another project or use them to make additional "stained glass" because you will have enough pieces left to do that if you wish.

 
Glue the frame piece onto your card front or your scrapbook page or make a backing for the frame that has no cutouts (do a trace and offset in Studio if you choose this last option) and carefully glue your frame to it.
Once you have all the colors weeded and in approximate order the fun begins. Now you get to pick and choose from among the different colors placing them in whatever color order you wish inside the frame.  When you have your pieces in the colors you want in the places you want, remove each piece one by one adding glue to the back of each piece and placing back inside the frame.
You can even take this one step further. Before you glue the pieces into the frame, run the tip of a black Copic, Letroset, or other marker around the cut edges of the main frame and then around each individual weeded element. This gives a thin black line that mimics the leaded edge around each piece of real stained glass.  It really makes your pieces pop I think.


Using black card stock for the frame gives you a another option for the "leaded" look.


I hope you enjoyed this tutorial and are inspired to try it. Have a wonderful week!
Hugs, Shawna


Wednesday, May 7, 2014

The Sun Room Studio

Hello!  I can't believe how long it has been since I have actually posted something new, but so far 2014 has not been kind to me and my family.  I know the pendulum will swing the other way again, it always does, and God never gives us more than we can handle, but suffice it to say I am ready for some good changes. 

I haven't been enthused about paper crafting in any form for months.  I think this started when I had to start my blog all over and lost so many readers; just so disheartening.  Then the family things happening.  It took its toll on my hobbies and in many other areas of my life.  

However, I got a bug the other day to rearrange and organize the Sun Room Studio and once I got going, I could feel the excitement for creating come sneaking back into my consciousness.  The room is not ready for me to sit down and make something, but it is getting there.  Soon!!! 

While cleaning, rearranging, and organizing I found myself going through my ribbon drawer.  What a mess!  I had organized some scraps a year or so ago, but the ribbon on reels was a complete mess.  The plan was to get things rearranged and semi organized into areas and product then begin sorting, tossing, and labeling, but I needed a little diversion and I had a thought about storing the ribbon to make it not only easier to see what I have, but more accessible, too. So here's what I did.  

 I salvaged some plastic containers from my recycle bin and scrubbed the labels off.  That Orange Clean stuff works pretty darn good and using a toothbrush instead of a finger nail is the way to go.  (As a former nail technician I can hear myself telling the clients "Your nails are jewels, not tools! Treat them accordingly")   ummm......  OK, where was I? 
Ah, yes.  Just spray the stuff on and let it sit for a couple of minutes then scrub away.  It really does come off pretty easily and there's none of that sticky residue left from whatever they use to attach their labels.
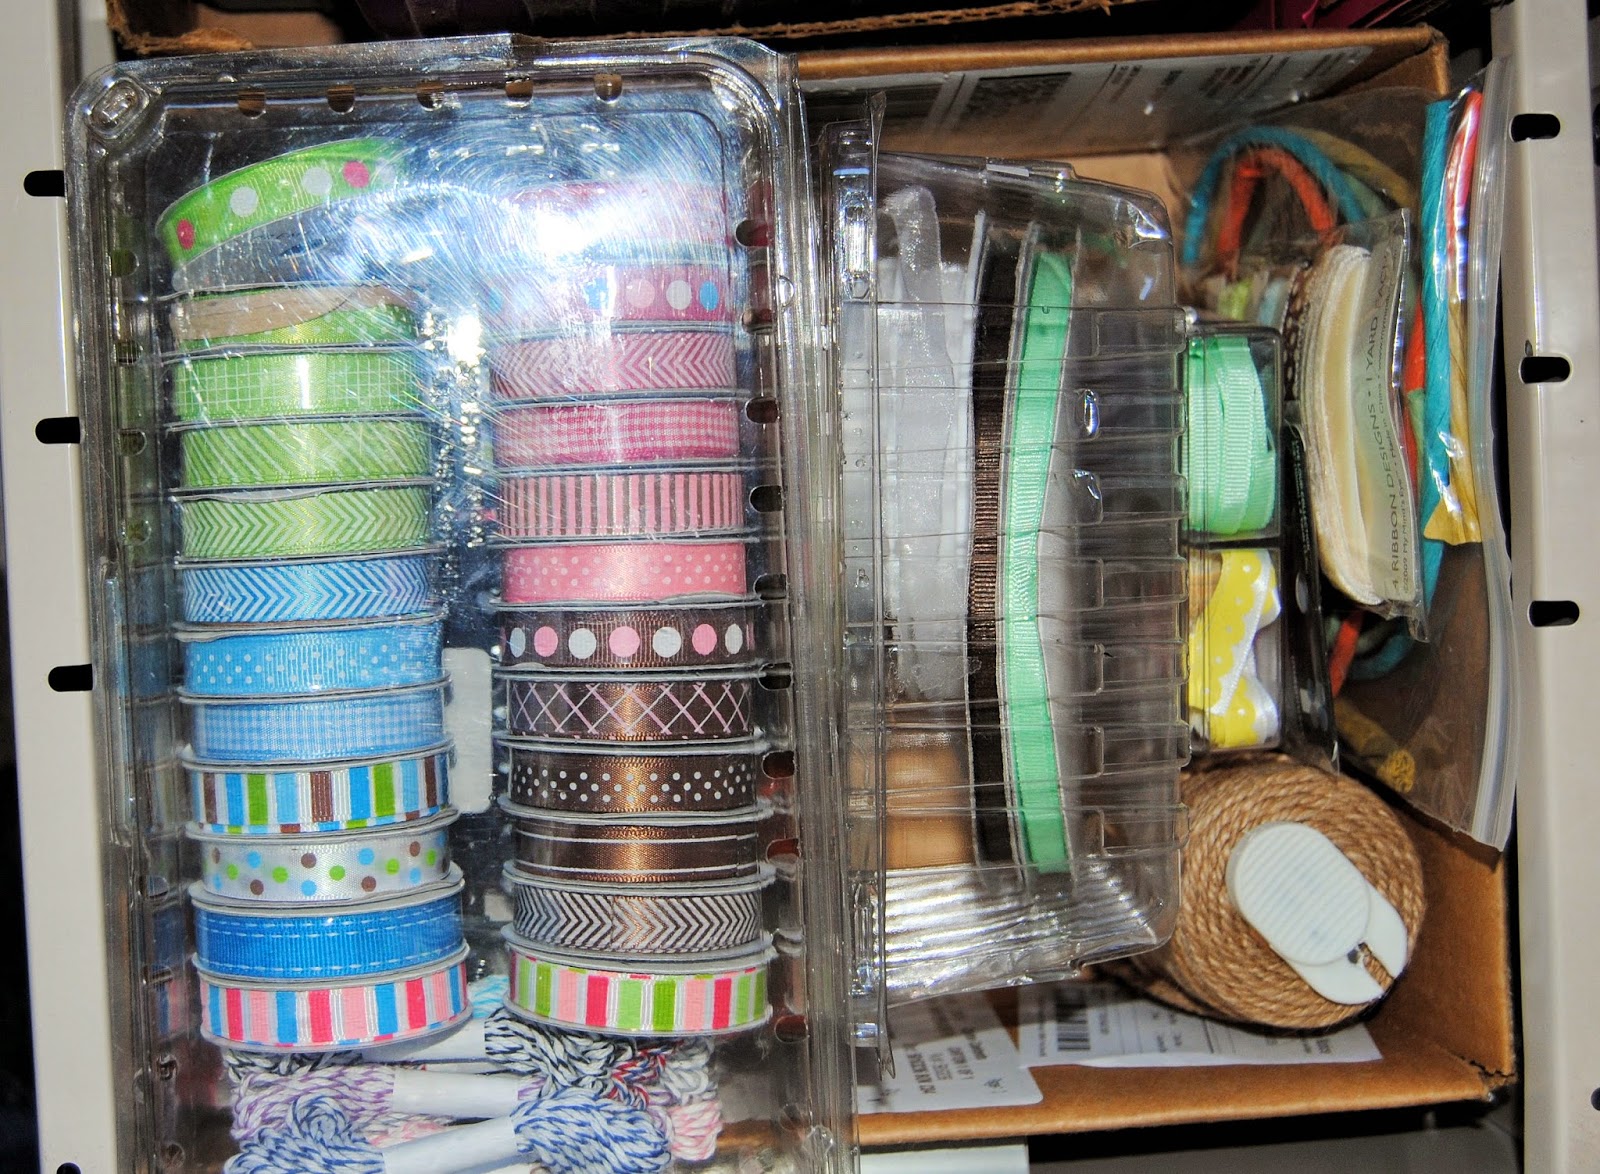
 This shot shows the container I scrubbed to store ribbon spools in. The container on the right is a plastic unit that artificial nail tips come in.  Very handy for small pieces of ribbon or ribbon that you buy that is not on a spool.

 I just had to get in a shot of the beautiful flowers a dear friend brought by the other day to cheer me up.  Her and her husband are the sweetest people! 
 This is the file cabinet drawer where I keep my ribbon.  The BEFORE photo.  Oh dear.
 Now it's all neat and organized.  The container on the right holds some large reels of ribbon that had to lie flat, but it's still so easy to identify what type and color of ribbon is in there.  That's the really nice thing about using these clear containers --- organized with easy identification of your supply, and not mention FREE!!!
Another clear container in the back that I cleaned up along with some thin colored school supply containers I bought years ago.  One holds buttons and the other has some netting and packages of a few ribbons I have never used.  Yet.   :-) 

Using these recyclables to help organize my ribbon collection is 'clearly' the solution for me. --- *Big Cheesy Smile*--- .  I did not get my yogurt made today, but dang, The Sun Room Studio is lookin' good!!!!

Thank you stopping by More Paper Kisses and Inky Wishes.   Hugs, Shawna