Showing posts with label Silhouette Sunday. Show all posts

Sunday, October 19, 2014

Another Fall Project

Please Note:  This is an old post from the former Paper Kisses and Inky Wishes Blog. 

 I have been working feverishly (wipng my hand across my brow...) in Paint Shop Pro trying to get a decent picture of my project. It's glass and I find glass so hard to photograph. But here goes....
OK --- look's like it worked fairly well :-)
 I found this adorable apple plate at the local second hand store and thought it would be perfect for a little fall etching project. Cutting stencils is easy peasy with the Silhouette. The only real 'trick' is to make sure you leave enough of a border so the etching cream doesn't get on any part of the glass that you do not want etched. The leaf in the upper left corner was an after thought because I wasn't paying enough attention, and a bit of the cream got up there where I didn't want it. Not really a problem because I just cut another stencil and etched that part, but if you are working on something that wouldn't lend itself to any additions, then you must be careful.
I am making a note to myself to check back with the thrift store tomorrow and get the other three plates they had. I hope you have a fabulous week and I thank you for stopping by.
Hugs, Shawna

Sunday, July 27, 2014

Birthday Past for Miss Emma

Previously posted on the former Paper Kisses and Inky Wishes blog.

Welcome to another edition of Silhouette Sunday. I hope you have enjoyed your summer because it is rapidly coming to a close. I hate to see it go, but on the other hand, well, things may slow down a bit and I am sure most of you could use some slower paced days. I sure can!!! Besides, we need to recoup before the winter holidays start, right?
As you can tell, I am not unhappy to see the backside of August. This has been one crazy busy month. Five people near and dear to me had surgeries, and three family members had birthdays ---- all on the same day, my oldest son moved and my granddaughter started high school. She went from a class of 11 to a class of 200 not knowing a single soul, but she handled it with grace and courage. One of my jobs has been off-the-charts busy, and the garden is producing....... you get the picture. I am ready for some R & R.
Today I wanted to share with you a card I made for the above-mentioned granddaughter whose birthday was one of the three this month. I picked a chunky font, enlarged it to card size, duplicated it, flipped it, and then welded it. Presto-chango, an alphabet card. Easy peasy with the Cameo! If you have a Silhouette Cameo, SD, or Craft Robo and need any kind of assistance please come join the Silhouette Plus forum HERE. Tons of information and a wealth of generous, friendly people to help out. We also have card challenges, 3d challenges, and a scrapbook challenge. Come join the fun!


I made this box from a cut file by Lori Whitlock (3d bookplate box) that I purchased from the Silhouette Store to put Emma's card in. I wanted something she could use for other things later on so I chose this bright, happy cardstock and purposely made it different from the card. Lori made the little tab holder on the front so the label actually comes out which I thought was so neat. I reinforced the box from the inside with a few pieces of chip board covered with white cardstock and this cutie is actually quite sturdy.
Thanks for stopping by today! Enjoy your holiday weekend. Hugs, Shawna

Sunday, June 29, 2014

Silhouette Sunday Revisited

Hi there! Welcome to another Silhouette Sunday.   This post is from the former Paper Kisses and Inky Wishes blog.  The Silhouette Store gives away a free file each week and a few weeks ago it was a nice cut file for making 3-D roses. The Silhouette Plus Forum (a site for Cameo and SD digital cutter owners to chat and problem-solve) holds a weekly challenge encouraging the members to make something with the free file. I made my roses but wasn't sure what I was going to do with them until today.
I cut several of the patterns and then worked the paper over good with the McGill flower tool set (they are double-ended tools with a metal ball on each end and come in several sizes) to soften the paper which makes the petals easier to shape. I also used a little spritz of water. Once the paper was good and soft I crumpled them all up in my hand and then ran an orange ink pad over the paper. The crumpled paper caught the ink at all the high points and gave the roses some nice depth. Once the ink had dried, starting in the center, I rolled the rose around a pair of long-nosed tweezers (you can also use a pencil) to give the rose a loose curled shape, making it easier to do the gluing. Gluing is the next step and all you do is put glue on a small section, begin rolling, add more glue, roll some more and continue in this manner until you have the paper rolled up and resembling a rose. Notice that the center of each flower is much tighter and then "blooms" as you shape the flower. Let dry and then bend and shape the petals to your liking. It's amazing how the same pattern used by different crafters makes each rose different and one of a kind. Please keep in mind that you can cut the rose pattern with scissors, too, you don't have to have a digital cutter. These are fun and rewarding to make and I like to work on these while watching TV in the evenings. Here's the roses before I made the actual card.....
I knew I wanted to have them clustered on one side and that I wanted to use the cut out shown in black, and it all finally came together in this card..................

It's hard to read in this photo, but it says "Happy Birthday Dear Friend" and I used a sketch pen in my Cameo with the Black Rose font. It's also hard to see on the finished card, but I ran the black frame that is around the sentiment through my Wizard using the Swiss Dots embossing folder.
Thanks so much for stopping by today. Have a wonderful week. Hugs, Shawna

Sunday, June 8, 2014

Sneaking Around

Before I get started on today's post, I would like to say that I discovered that what I thought was the email portion of  the choices given for following More Paper Kisses and Inky Wishes was something else, so if you wanted to following along by email notification I have fixed that error.  Please try again.

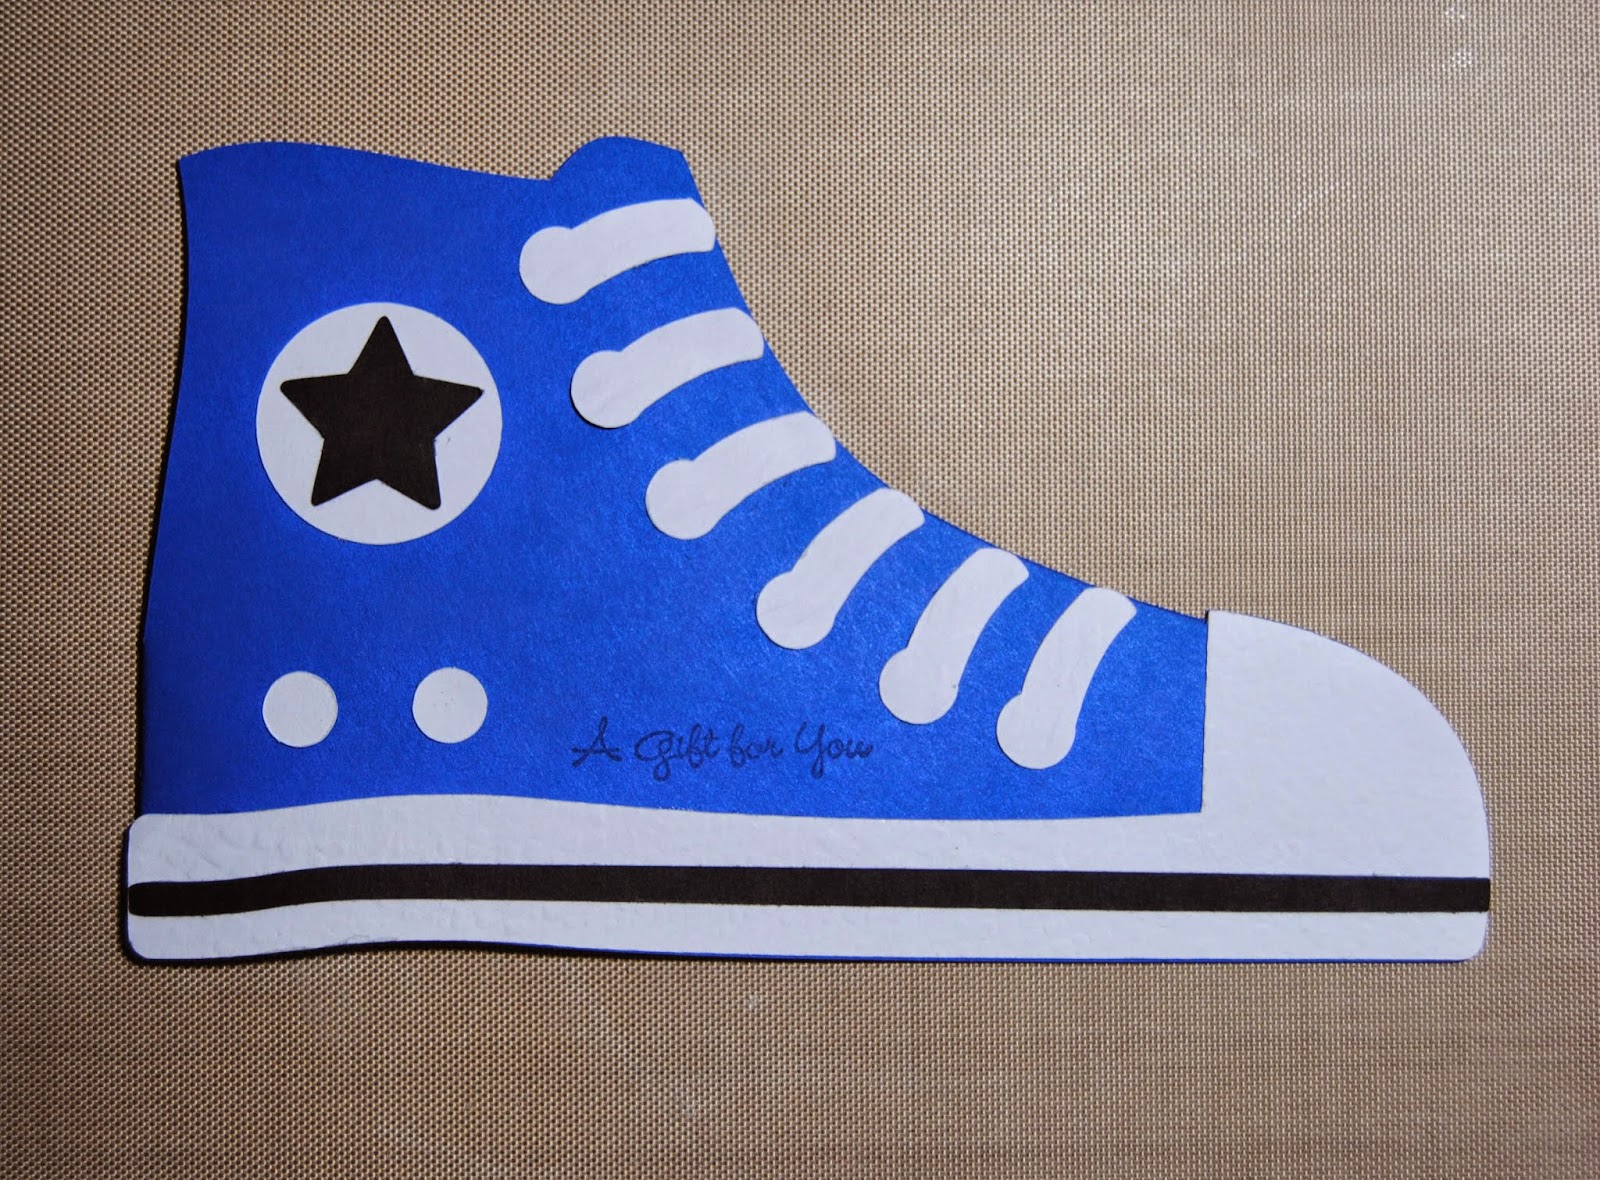
Trying to come up with a card idea for my oldest grandson's 15th birthday was made so much easier by browsing the Silhouette Store.  As many of you know, masculine cards are a challenge for me, but I can always count on Silhouette to help me out :). I wanted something fun yet quick to put together, and I found just the right cut file in the Silhouette Store called, who would have guessed, SNEAKER.  :)   In just a few easy steps and with just a couple of little extras, this card was ready to send.
  1. Choose the paper.     
  2. I duplicated the file in my Silhouette Designer Edition software, flipped one of the duplicates horizontally, then welded them together at the heel to make the card base (an easy technique to turn almost any cut file into a card).
  3. I cut one extra single shoe outline file, in white,  to add to the inside.  I cut the toe and sole piece as well as the laces and large and small circles out of white also.  The star and decorative line on the sole were cut from black. 
  4. I ran the toe/sole and the shoe lace pieces through my Grand Caliber with a Fiskars texture plate to give a bit of texture.   It's amazing what this does for the aesthetics of a paper creation.  Too bad it doesn't show up better in the photo!
  5. The individual pieces were then adhered to the card base.
  6. I stamped my chosen sentiment for the outside, used a CTMHs 'Happy Birthday' stamp for the inside sentiment, signed it, added cash, and it was ready to give. 

P.S.  He was thrilled with the card.  Said it looked just like his real tennies (referring to the circle and star feature).  That was just a piece of blind luck! 

Thank you for stopping by!  Hugs, Shawna

Sunday, May 11, 2014

Getting a Faux Stained Glass Look

Hi! Thanks for stopping by today. This Silhouette Sunday will be a tutorial for a "stained glass" technique using your SD or Cameo. First, just let me say this is my very first tutorial so please bear with me and please be kind! :-) Let's get started.

Choose a file with a lot of cut-out pieces. Frames work great and that is what I am using for this tutorial.

Once you have your file up on the the design board in Studio adjust it to your desired finished size. Next decide how many colors you want to use and choose your papers accordingly.
The next step is to cut the exact same file as many times as the colors you have chosen for your design. Six colors? Cut six designs, all the same size.
Choose the color you want to be the main frame and weed. Weed the other frames as well; these weeded pieces will be used for the different elements inside the edges of your frame. Keep them someplace safe where they will not get knocked around and lost. I find it is easiest to place the weeded pieces inside a shallow pan or in a box lid in a pattern loosely matching the design pattern.   The idea is to have them in enough order so that you can choose the right piece for the right cut out. Believe it nor not, even mirrored images can be a tiny bit off in size and if you get a piece meant for the right side in the left hole and vice versa it might not fit properly. Back and front orientation is important, too. You can save the extra frames for another project or use them to make additional "stained glass" because you will have enough pieces left to do that if you wish.

 
Glue the frame piece onto your card front or your scrapbook page or make a backing for the frame that has no cutouts (do a trace and offset in Studio if you choose this last option) and carefully glue your frame to it.
Once you have all the colors weeded and in approximate order the fun begins. Now you get to pick and choose from among the different colors placing them in whatever color order you wish inside the frame.  When you have your pieces in the colors you want in the places you want, remove each piece one by one adding glue to the back of each piece and placing back inside the frame.
You can even take this one step further. Before you glue the pieces into the frame, run the tip of a black Copic, Letroset, or other marker around the cut edges of the main frame and then around each individual weeded element. This gives a thin black line that mimics the leaded edge around each piece of real stained glass.  It really makes your pieces pop I think.


Using black card stock for the frame gives you a another option for the "leaded" look.


I hope you enjoyed this tutorial and are inspired to try it. Have a wonderful week!
Hugs, Shawna